Category Archives: Raw

ORANGE WALNUT STUFFED DATES

I am always trying to create healthier desserts.  I was inspired to make this dessert by some dates I had seen stuffed with cheese (I didn’t try them, but like the idea of stuffing dates).  Since the dates are so sweet, the filling does not need to be…it would be overpowering if it was.  I love how the orange flavor in the filling is subtle, but is definitely there.

These stuffed dates would be a great ending to a nice meal (or passed around on a platter as a sweet hors d’oeuvre).  Brew some Celestial Seasonings Tangerine Orange Zinger herbal tea and offer the dates to your guests with sliced mandarins on the platter as well.

Photo Courtesy of Celestial Seasonings

2 stuffed dates should be more than enough for each person.  I did not make all 36 dates the last time I made these, so I froze the remaining filling to use on another occasion…I’ll let you know how it works out.

INGREDIENTS – makes up to 36 stuffed dates

1/2 cup So Delicious Unsweetened Coconut Milk
1/3 cup orange juice (from approx. one orange)
2 Medjool dates
1 cup walnuts
1/4 tsp cinnamon
1/2 cup cashews
zest of 1 orange + more for garnish
36 dates for stuffing
 

Place the coconut milk, orange juice, dates, walnuts, and cinnamon into your high speed blender and blend until smooth.

Once smooth, add the cashews and orange zest and blend until smooth.

Put the completed filling into a pastry bag and refrigerate for 1-2 hours (2 hours is best).

Prepare the dates by slicing lengthways down to the pit.  Open the date carefully (you do not want to tear it in half) and use your fingers to form the date into a circle with the hole on top.  Remove the pit.

Pipe the refrigerated filling into the prepared dates.

Top each filled date with a sprinkling of cinnamon and orange zest.

Serve with sliced oranges or mandarins as an accompaniment.

For a printable version of this recipe click here.

3 Comments

Filed under Dessert, Gluten Free, Raw, Recipes, Vegan, Vegetarian

CHEEZY HEMP NACHO SAUCE – Guest Blog by Kristen Suzanne of Kristen’s Raw

Kristen Suzanne

Kristen Suzanne

Today’s guest blog is by Kristen Suzanne, who is a leader in the raw food world.  She is an accomplished Raw Food Chef and former competitive bodybuilder. Through radio, television, books, classes, and her blog and email newsletter, Chef Kristen Suzanne helps people live life to the fullest with the healthiest cuisine in the world.  To learn more about why Kristen chose the raw food lifestyle click here.

Enjoy her post…

Cheezy Hemp Nacho Sauce

Cheezy Hemp Nacho Sauce

Hemp foods, now widely available in health food stores across the country, are taking the natural foods world by storm! A true “superfood,” hemp is high in protein, has excellent ratios of all the essential amino acids and essential fatty acids, tastes absolutely delicious, and is amazingly helpful to the environment due to its fast growth and lack of need for herbicides or pesticides.

Hemp is not your typical granola fare — it’s a subtle and delicious dream come true for foodies and connoisseurs of everything exotic and unique!

Let me tell you, this recipe is so good! I mean, like, really really awesomely delicious. I’ve made it every week for the past five weeks because we seriously cannot get enough of it. I’ve made it for lots of different people (non-Raw and Raw) and they all love it… I’m talking “lick-the-bowl-please-give-me-more” loving it. It’s perfect for showing off at the next party you attend or host. And, of course, it’s full of nutrition… hemp seeds (complete protein, essential fatty acids), red bell pepper and garlic (antioxidants, vitamins, minerals), and more. So, without further ado… here it is!

CHEEZY HEMP NACHO SAUCE

INGREDIENTS – Yield approximately 1 1/2 cups

1/3 cup water
1 clove garlic
2 tablespoons fresh lemon juice
1 red bell pepper, seeded, rough chopped (approximately 1 cup)
1 cup hemp seeds
2 1/2 tablespoons nutritional yeast flakes
1 tablespoon chili powder*
2 teaspoons tamari, wheat-free
1/2 teaspoon Himalayan crystal salt
1/2 teaspoon garlic powder
1/4 teaspoon cayenne pepper
1/8 teaspoon turmeric powder

*My favorite is by Simply Organic

Blend all of the ingredients in a blender until smooth and creamy. This can be stored in the refrigerator for 4-5 days. · Use this for dipping fresh veggies or corn chips (Raw or not – it’s up to you!)

Serving suggestions:
· For those eating cooked vegan foods, this is an awesome sauce on top of veggie burgers
· This also makes a delicious Raw vegan dressing on a hearty salad with romaine lettuce, chopped tomatoes, and cucumbers. You could even sprinkle on some Raw vegan taco meat and Fun Corn Chips for a tortilla type salad.

For a printable version of this recipe click here.

5 Comments

Filed under Cheese, Gluten Free, Guest Blog, Raw, Recipes, Sauce / Spread / Jam / Yogurt, Vegan, Vegetarian

SWEET VALENTINE – Raw Chocolate Peanut Butter Molten Cake

Raw Chocolate Peanut Butter Molten Cake

Raw Chocolate Peanut Butter Molten Cake

In daily life we really do want to minimize / eliminate sweets, but who can resist a little chocolate on Valentine’s Day?  Make this raw molten cake with peanut butter lava for your honey and I guarantee they will be feeling the love.  This is sooooooo yum!

INGREDIENTS – Makes 6 individual molten cakes

Cake

2 cups raw pecans (best result if frozen)

2/3 cup raw agave

1/2 cup raw cacao powder

1/2 cup coconut flour

Filling

1 Tbs. organic peanut butter for each cake

Toppings

Fun Fresh Foods chocolate agave nectar 

powdered sugar for dusting

fresh sliced bananas

~

Take the frozen pecans and place them in the food processor (I use a Cuisinart I purchased at Costco).  Turn on the processor and process until the nuts become meal.  Do not process too long or it will turn into nut butter.

Frozen Raw Pecans

Frozen Raw Pecans

Process Into a Meal

Process Into Meal

Pour the raw agave into the nuts while processing.  The nuts and agave will turn into batter.

Batter

Batter

Add the raw cacao and process to incorporate.  The processor will begin working very hard…you may have to stop and scrape down the bowl. 

Add the Cacao Powder

Add the Cacao Powder

Scrape Down the Sides

Scrape Down the Sides

When well mixed, take the batter out and transfer it to a bowl.  Wearing latex-type gloves (to avoid sticking), mix in the coconut flour with your hands.

Transfer to a Bowl

Transfer to a Bowl

Add the Coconut Flour

Add the Coconut Flour

Use Hands to Incorporate

Use Hands to Incorporate

Line your mini cake molds with saran wrap.

Mini Bundt Molds

Mini Bundt Molds

Line With Plastic Wrap

Line With Plastic Wrap

Once mixed well, use a 2 Tbs. ice cream scoop to fill each of the 6 molds.  Wrap the remaining cacao batter in Saran Wrap and place it as well as the filled molds in the fridge for 30 minutes to harden.

Scoop in Batter

Scoop in Batter

Wrap-up Remaining Batter and Chill

Wrap-up Remaining Batter and Chill

Once hardened take the molds out and wearing gloves press the batter into the molds making a well in the middle.  Make sure you spread the cacao mixture as evenly as possible so it dehydrates evenly.  Fill the wells with 1 Tbs. of organic peanut butter (or chocolate sauce). 

Press Into Molds Evenly Then Create Wells

Press Into Molds Evenly Then Create Wells

Add Filling (Peanut Butter or Chocolate)

Add Filling (Peanut Butter or Chocolate)

Take the remaining batter that was in plastic wrap out of the fridge and pinch off enough (approx. 1 Tbs.) to make a disc that will cover the bottom of each PB filled mold.  Gently press the disc onto the bottom of the filled cakes.

Shape Disc for Bottom

Shape Disc for Bottom

Ready to Chill Again

Ready to Chill Again

Put the cakes in the fridge for another hour to harden.  Keep the cakes in the fridge until 2 hours before you plan on serving them.

2 hours before serving time place the cakes on your dehydrator’s mesh tray and dehydrate for 2 hours (It takes longer than that for the Excalibur dehydrator get to 115°, so rest assured those enzymes will still be alive and kicking).

Place on Mesh Dehydrator Trays

Place on Mesh Dehydrator Trays

Dehydrated Cakes

Dehydrated Cakes

When the 2 hours is up you will notice that the cakes are no longer shiny, they will look matte as if they have been cooked.  Top each cake with some chocolate sauce, a very thin sprinkling of organic powdered sugar, and sliced bananas.  Serve IMMEDIATELY since these cakes are best warm…it will allow the peanut butter to ooze out when cut into.

Raw Chocolate Peanut Butter Molten Cake

Raw Chocolate Peanut Butter Molten Cake

I also made an all chocolate version using the Fun Fresh Foods chocolate agave nectar as the filling…topped with powdered sugar and strawberries!

Raw Chocolate Molten Cake

Raw Chocolate Molten Cake

For a printable version of this recipe click here.

3 Comments

Filed under Dessert, Gluten Free, Holiday, Nuts, Raw, Recipes, Vegan, Vegetarian

RAW MAPLE APPLE CINNAMON SCONES

Raw Maple Cinnamon Apple Scones

Raw Maple Cinnamon Apple Scones


INGREDIENTS

Makes 16 scones 

4 apples

2 cups almond pulp (from making almond milk)

2/3 cup ground flax meal

2/3 cup water

2/3 cup raisons

1/4 cup coconut sugar

1/4 cup maple syrup

1 Tbs. cinnamon

~

Quarter the apples and remove the core.  Cut the apple quarters in thirds and place them in the food processor to turn it into raw applesauce.  You may need to stop occasionally and scrape down the sides.

Put the Apples in the Food Processor

Put the Apples in the Food Processor

In a small bowl combine the flax meal and water.  Allow this mixture to sit and congeal (this is what will bind the scones together).

Add Water to the Flax Meal

Add Water to the Flax Meal

Allow the Mixture to Congeal

Allow the Mixture to Congeal

In a large bowl combine the almond pulp and flax mixture.   Mix thoroughly. 

Add the Flax Meal to the Almond Pulp

Add the Flax Meal to the Almond Pulp

Add the applesauce to the above mixture and mix well.

Mix in the Applesauce

Mix in the Applesauce

Now add the cinnamon, coconut sugar, maple syrup, and raisons.  Mix thoroughly.

Add the Remaining Ingredients

Add the Remaining Ingredients

Measure out 1/3 cup of the batter and form it into a scone (I use a large ice cream scoop). 

Measure Out 1/3 Cup

Measure Out 1/3 Cup

Form the Scones

Form the Scones

Formed Scone

Formed Scone

Place the scone on the mesh sheet of your dehydrator.  Do the same with the remainder of the batter.

Formed Scones on Mesh Sheets

Formed Scones on Mesh Sheets

Dehydrate at 140° for 2 hours.  After 2 hours flip over the scones and then turn the dehydrator down to 115°.  Dehydrate for 3-4 hours more. 

Put in the Dehydrator

Put in the Dehydrator

I keep the scones in the freezer…they defrost fast.

Raw Maple Cinnamon Apple Scones

Raw Maple Cinnamon Apple Scones


For a printable version of this recipe click here.

3 Comments

Filed under Breakfast, Gluten Free, Raw, Recipes, Snacks, Vegan, Vegetarian

HOMEMADE STRAWBERRY ALMOND MILK

Strawberry Almond Milk

Strawberry Almond Milk

Homemade almond milk is sooooooo creamy and NOTHING like the almond milk you buy in the store.  Today I made some plain almond milk and when my son came home from school I used it to make him strawberry almond milk, which is one of his favorites.  As we were sitting around the kitchen island drinking the strawberry milk, I mentioned that I was going to post my recipe for plain almond milk and my husband told me that I NEEDED to post my recipe for the strawberry milk as well (he was literally telling me this while drinking the tiny amount of strawberry milk that was left straight out of the blender container).  I hope you enjoy the strawberry milk as much as we do!

INGREDIENTS FOR PLAIN ALMOND MILK

2 cups raw almonds

4 cups filtered water

INGREDIENTS FOR STRAWBERRY MILK

1 cup plain almond milk

1 ½ – 2 cups frozen strawberries

2 tsp. raw agave syrup (adjust depending upon the sweetness of your berries)

~

Place the raw almonds in a container and fill the container with filtered water.  Place the container in the fridge overnight to soak.

Soak the Almonds in Water

Soak the Almonds in Water

Almonds Soaked Overnight in Fridge

Almonds Soaked Overnight in Fridge

NOTE: The almond milk can be made without soaking the almonds, but I strongly suggest that you do.  Soaking the nuts will make the milk more creamy, but the main reason you want to soak the nuts is to destroy the enzyme inhibitor.  Nuts were created with an enzyme inhibitor that prevents them from prematurely sprouting.  This inhibitor also makes it hard for many people to digest nuts well.  When you take the time to soak the nuts, the inhibitor is neutralized and the enzymes come to life…per my earlier post enzymes are very beneficial to us.

Rinse the soaked almonds under cold water.  At this point you may remove the almond skins if you’d like.  I personally don’t mind the skins and keep them on when I make my milk.

Rinse the Soaked Almonds

Rinse the Soaked Almonds

Remove the Skins if You'd Like

Remove the Skins if You'd Like

Place the clean soaked almonds in your Vitamix or blender with 4 cups of filtered water and blend until smooth (2-3 minutes).
Place Rinsed Almonds in Vitamix w/ Water

Place Rinsed Almonds in Vitamix w/ Water

Blend Thoroughly

Blend Thoroughly

Put the nut milk bag into a large bowl.  Pour the almond mixture into the nut milk bag and squeeze the liquid into the bowl.  Once all of the liquid is out of the bag your plain almond milk is complete. 

Place Nut Milk Bag in a Large Bowl

Place Nut Milk Bag in a Large Bowl

Pour Blended Mixture Into Bag

Pour Blended Mixture Into Bag

Squeeze Bag

Squeeze Bag

Only Pulp Remaining

Only Pulp Remaining

 Reserve the nut pulp for another recipe.  I put my pulp in a bag and lay it flat in the freezer until I am ready to use it in a recipe.

Almond Pulp

Almond Pulp

The plain almond milk is now complete.  I prefer to store the almond milk in the fridge in its plain state (great with cereal)…that way I can embellish however I’d like. 

Plain Almond Milk

Plain Almond Milk

Store Plain Almond Milk in the Fridge in a Mason Jar

Store Plain Almond Milk in the Fridge in a Mason Jar

Sometimes I will add some stevia for a sweeter taste or add some chocolate syrup and make chocolate milk (warmed-up it makes a very yummy hot cocoa), but our family’s FAVORITE almond milk is the strawberry…

Rinse out your blender.  Pour 1 cup of the plain almond milk into the blender.  Start the blender and add the frozen strawberries one at a time through the opening in the lid.  Blend until smooth.  Add the agave syrup and blend again.  Taste the strawberry milk and add more sweetener if needed.  Drink immediately as this is when the flavor is best.  It will not store well, so it is best to make it in small batches that you will drink right away.

Strawberry Almond Milk

For a printable version of this recipe click here.

15 Comments

Filed under Dessert, Drinks, Gluten Free, Raw, Recipes, Vegan, Vegetarian

CRUNCHY CANDIED NUTS

Crunchy Candied Nuts

Crunchy Candied Nuts

These are the candied nuts that I use in my kale salad recipe.  The other night I ran out of candied nuts and put roasted nuts in the kale salad we were having with dinner…my family made it very clear to me that the candied nuts are an integral part of the kale salad!  So, today I needed to make some more candied nuts.

INGREDIENTS

2 cups assorted raw nuts

1/3 cup coconut sugar

1/3 cup shredded coconut

2-3 Tbs water

1 tsp cinnamon

~

First measure out the raw nuts. 

Raw Nuts

Raw Nuts

In a separate bowl put the coconut sugar, shredded coconut, cinnamon, and water.  Mix well.

Sweet Coating Pre-Mix

Sweet Coating Pre-Mix

Mixed Sweet Coating

Mixed Sweet Coating

Combine the sweet coating with the raw nuts.  Mix well to coat.

Sweet Coating on the Raw Nuts

Sweet Coating on the Raw Nuts

Place the nuts on either a cookie sheet (I also use a silpat) or on a dehydrator tray with a ParaFlexx lining.

Place On A Baking Sheet

Place On A Baking Sheet

Or a Dehydrator Tray

Or a Dehydrator Tray

If you plan on baking the nuts, put them in the oven at 200 degrees.  You will need to watch the nuts carefully to make sure they do not burn.  The candied nuts will be done when the coating is no longer wet.  When you take them out of the oven to cool they will harden.  If they are not crunchy enough for you, return them to the oven for some additional baking time. 

If you will be using the dehydrator (I used my Excalibur), put the tray of nuts in the dehydrator at 115 degrees for 8-10 hours. Check the nuts after about 3-4 hours, take them off of the Paraflexx, and place them directly on the Polyscreen tray.  Once you remove the nuts from the dehydrator they will crisp as they cool. 

Into the Dehydrator

Into the Dehydrator

When the nuts have cooled, put them in a bag and store them in the freezer.

For a printable version of this recipe click here.

10 Comments

Filed under Gluten Free, Nuts, Raw, Recipes, Vegan, Vegetarian

SPROUTING 101

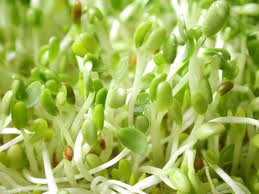
Sprouts

Sprouts are amazing!  We all know that when we purchase produce from the grocery store it is in our best interest to eat the produce ASAP as its nutritional value begins to decline shortly after harvest.  Sprouts don’t do this.  Sprouts are considered LIVE food and they can continue to grow even after being refrigerated.

Sprouts are rich in vitamins, minerals, protein, and enzymes.  Enzymes are powerful partners in our health and we need them in order to digest our food.  Kris Carr’s Crazy Sexy Diet adds, “Food enzymes have another wonderful purpose:  They allow your pancreas to take a break from secreting digestive enzymes.  When this happens, your good old pancreas releases more metabolic enzymes for detoxification, renewal, repair, and general overall maintenance.”

For all of you out there who don’t eat as many veggies as you should, sprouts would be a highly beneficial addition to your diet.  According to researchers at John’s Hopkins University, “[T]he active ingredient in the broccoli, sulforaphane, is actually present at levels 20 to 50 times greater in 3-day-old broccoli sprouts. Sulforaphane is present in broccoli relatives, too, but amounts are highest in broccoli. To get the amount of sulphoraphane present in 2 pounds of broccoli, you need to eat only 1/4 ounce of sprouts.”  Sprouts are much more nutritionally potent than their full grown counterparts.

Broccoli Sprouts

There are sooooo many different varieties of sprouts… alfalfa, broccoli, onion, sunflower, wheat berry, clover, radish, etc.  You can also sprout beans, nuts, and seeds (which makes them more digestible).  For more information about the nutrient power of specific sprouts click here.

It truly is easy to grow your own sprouts.  I used to buy sprouts in the store, but I have been growing my own since November of 2010 and I love that I know where they come from and how fresh they are.  There are many websites that sell sprouting seeds, but some of my favorites are Sproutman.com, Sproutpeople.org, and Wheatgrasskits.com .

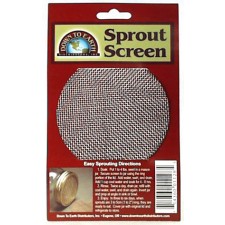
As for sprouting supplies, you really only need the seeds, a wide mouth mason jar, and a lid with a screen.  I have used both the metal mesh screens and the plastic ones and I am very partial to the metal ones.  Though the metal screens do tend to accumulate a little bit of rust, the plastic screen lids don’t seem to let the same amount of air through and the sprouts don’t end-up as hearty.  You can purchase the metal screens by clicking here.


The sprouting process is very simple.

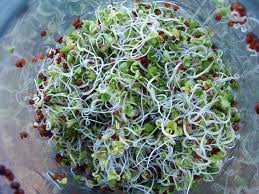
Alfalfa Sprouting Seed

Put enough seeds into the jar to cover the bottom (I use about 3 spoonfuls).  Soak the seeds in filtered water for 8-12 hours.

Soak 8 -12 Hours

Pour the water out through the mesh screen and rinse the seeds with filtered water a few times until the water pours out clear (make sure you leave the mesh screen and lid on when rinsing so you do not lose any seeds).  Once rinsed, tip the jar on its side and leave it in the windowsill.  Rinse the seeds with fresh water 3-4 times a day.

If you have children, make sure you get them involved…they will love watching the sprouts grow.

Rinse & Prop on Side (Day 1)

Rinse & Prop on Side (Day 1)

Bottom View of Sprouting Seeds (Day 2)

Bottom View of Sprouting Seeds (Day 2)

Bottom View of Sprouts (Day 3)

Bottom View of Sprouts (Day 3)

Side View of Sprouts (Day 3)

Side View of Sprouts (Day 3)

Sprouts FILLING Entire Jar (Day 4)

Sprouts FILLING Entire Jar (Day 4)

Once the sprouts have filled the jar, put them into a deep bowl and cover them with fresh water.  Agitate the sprouts with your hand and the shells of the seeds will float to the top of the bowl.  Pour out the water and the seed shells (be careful to keep the sprouts in the bowl).  Continue this process until there are no more seed shells remaining.

Rinsing Seed Shells

Once cleaned of the shells, place your sprouts in the refrigerator (I keep the mesh lid on so they can breathe).  Make sure you rinse your sprouts on a daily basis to keep them fresh.

Store in the Fridge

7 Comments

Filed under Education, Gluten Free, Raw, Recipes, Sprouting, Vegan, Vegetables, Vegetarian

VEGAN GOAT CHEESE

Raw Vegan Goat Cheese

When people make the decision to remove dairy from their diet cheese is often what they say they miss most.  Dairy is NOT healthy (in the future I will do an in-depth post to explain why) , so it is important that we find good alternatives.

Russell James

Russell James

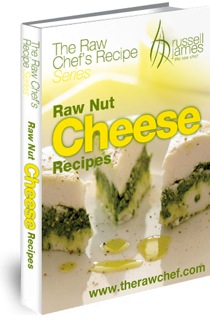
I recently purchased one of Russell James‘ e-books called Raw Nut Cheese from his Raw Chef’s Recipe Series and decided to give the goat cheese recipe a whirl.

Raw Nut Cheese by Russell James

I have made raw nut cheese before and they weren’t as successful as this recipe was (I am eating it as I type…yum!).  I think the curing step is key…

INGREDIENTS – day one

2 cups raw unsalted macadamias, soaked 4 hours

1 cup water

1 tsp. probiotics powder (I used New Chapter Organics All Flora)

INGREDIENTS – day two

1 tsp. nutritional yeast

½ tsp. salt

1 tsp. lemon juice

Soak the macadamia nuts in filtered water for 4 hours.

Raw Macadamias

Soaked for 4 Hours

Blend the soaked nuts with 1 cup of filtered water and 1 tsp. probiotics powder in your high-powered blender (I used my Vitamix).  Make sure all of the nuts are blended well and there are no chunks.

Water & Probiotics

Blend Macadamias & Water

Blend Away All Lumps

Transfer the mixture to a cheesecloth-lined strainer that has been placed over a bowl.

Strainer Over Bowl

Line Strainer w/ Cheesecloth

Fold the cheesecloth over the cheese and place a weight over the top (I used a plate with pie weights over it).  Allow this mixture to cure at room temperature for a full 24 hours.

Put the Mixture in the Cheesecloth Lined Strainer

Fold Over the Cheesecloth

Top w/ Weight

Once the cheese has cured, mix in the nutritional yeast, salt, and lemon juice.

Cheese Texture After Curing

Add the Nutritional Yeast, Lemon, & Salt

Place the mixture in a Saran wrap lined spring form pan (I used a 5” pan) and place in the refrigerator to firm-up.

Put the Cheese Mixture in the Pan

Close the Plastic Wrap

When the cheese is more firm (it will never get firm…it will become the texture of goat cheese) and ready to serve, top it with your choice of toppings i.e. pesto, chopped sun dried tomatoes, fresh herbs.  The next time I make this cheese I plan on mixing pesto directly into the mixture.  This cheese is great served with crackers, on a salad, or in a sandwich.

Raw Vegan Goat Cheese

For a printable version of this recipe click here

18 Comments

Filed under Books, Cheese, Gluten Free, Raw, Recipes, Vegan, Vegetarian

MY KID’S MORNING JUICE

Ready to Juice

Ready to Juice

As often as I can I try to start the kid’s morning off with fresh juice made from my Breville juicer.  The school week can be really busy and it isn’t always easy to cram in all of the nutrients they need to fuel their afterschool activities.  Fresh squeezed juice is a fantastic way to give their bodies what it craves.  In a perfect world my kids would drink 100% vegetable juice, but reality is different.  I can get the kids to drink their green veggies as long as I temper them with the sweetness of apples and carrots.  Little by little I have been able to add more and more greens. 

These were the ingredients in my kid’s juice this morning:

My Kid's Morning Juice Ingredients

My Kid's Morning Juice Ingredients

If your kids are new to juicing, start them off with apple juice (I have never met a kid that didn’t LOVE fresh squeezed apple juice).  Move on from there by slowly adding more and more carrots to the mix (also very sweet).  After a while you will be able to add in greens.  I find spinach, romaine, and sugar snap peas to be very mild in taste, so those are your best bets when starting to add greens to your juice.

You don’t need to own a juicer in order to make fresh juice.  If you own a blender or a Vitamix and have a nut milk bag or cheesecloth, then you can make juice.  It will be a bit more work, but well worth it.  In order to make juice with a blender you will need to add some water to the pitcher, chop in your veggies (watery veggies and fruits should go in near the bottom where the blade is), blend and then strain through the nut milk bags into another bowl.  Work in batches until you are done.

Nut Milk Bag

Nut Milk Bag

Cheesecloth

Cheesecloth

To make the juice, prepare all of your fruits and veggies by washing them and cutting them down to size if they are too big to fit through the opening of your juicer.  Once your produce is ready, set-up your juicer.  In order to minimize clean-up, I like to line my juicer’s pulp collector with one of my recycled produce bags.  Also keep some paper towel or an extra cup on hand for when you remove the juice pitcher.  I block the juice nozzle with a paper towel whenever I move the juice pitcher away…otherwise it will drip onto the counter.

When you juice, make sure you juice the softer fruits and vegetables first (i.e. romaine, cucumber, sugar snap peas, tomatoes) and then push the rest of their pulp through with the harder fruits and vegetables… this will ensure that you get as much juice out of them as you can. 

Softer Produce First

Softer Produce First

Most importantly, get your kids involved.  When children participate in making their food, they are much more likely to actually consume that food.

Get the Kids Involved

Get the Kids Involved

Some kids are very put off by the color of juice that has carrots or greens in it.  I have found a way around that by purchasing some fun cups in different colors.  When my daughter drinks out of her fun green cup with the cool straw, she has no idea what color the juice actually is.  You could also get some wacky straws to help encourage your children to drink the juice.

Using a Fun Colored Cup

Using a Fun Colored Cup

Since we are on the subject of juice, I thought I’d show you what my morning juice consisted of.  Most of you won’t start with this many veggies…work up to it with the same method as described above for the kids.

My Morning Juice Ingredients

My Morning Juice Ingredients

When my daughter saw the juice she named it “Mommy’s Rainbow Juice.”

Rainbow Juice

Rainbow Juice

Don’t forget to compost your juice pulp…your garden will thank you.

Here’s to health!

Leave a comment

Filed under Food Journal, Fresh Juice, Gluten Free, Raw, Recipes, Vegan, Vegetarian

DECADENT DESSERTS AT 118˚

The Restaurant

Today I went to a raw cooking class at Jenny Ross’s 118˚ in Costa Mesa and had a great time.  This was my first official raw foods cooking class.  I have a few raw foods dessert cookbooks (Ani Phyo’s and Kristen Suzanne’s) that I cook from, but nothing can quite compare to a class where there is interaction and discussion.  I loved being able to bounce questions and ideas off of the creator and chef of 118˚, Jenny Ross.

All of the ladies in the class (there were 8 of us) were really interesting.  Among us there were vegan chefs, a nurse practitioner, a woman who is a two time cancer survivor and has made the switch to vegan/raw in an effort to remain healthy, myself, and others interested in learning more about raw vegan food.

118˚ This Way

We all met at the restaurant which is located in the shopping center called The Camp and then made the  short walk over to the Seed Market where the actual class took place which is right above Patagonia.  I have never been to this area of Costa Mesa and really look forward to going back to explore…it has a Sant Cruz kind of vibe.

The Camp in Costa Mesa

The class began by making three different dessert sauces; caramel, coconut cream, and chocolate sauce.  Chef Jenny made the sauces and then put them into squeeze bottles that she bought at Sur La Table (she said they sell BPA free squeeze bottles).  That is such a great way to store the sauces and it makes them easy to use on their own, i.e. with fruit or to squeeze right into the dessert recipes she uses the sauces in.

Cooking With Chef Jenny Ross

Next we moved onto dessert crusts and made a walnut based crust and a pecan based crust (that we later embellished to make raw brownies).  Below you see me making the walnut crust with Chef Jenny.

After making the crusts we moved on to making apple cobbler, avocado orange bars, chocolate brownies with chocolate fudge, macaroons, halvah with apples, drunken fruit, and fruit fondue.

By the end of class we all had a lot of desserts to take home.  When I got home my kids decimated the brownies…so good!

Completed Desserts

All in all it was a lot of fun and VERY educational.  I learned so much more from her about how to use my Excalibur dehydrator more effectively and different twists on making raw pie crusts, etc.  I can’t wait to whip up some more raw desserts…I am sure the kids won’t object.

Me & Chef Jenny Ross

5 Comments

Filed under Dessert, Education, Gluten Free, Raw, Restaurants, Services, Vegan, Vegetarian