Monthly Archives: February 2011

QUICK DINNER – Tomato Basil Pasta

Tomato Basil Pasta

Tomato Basil Pasta - Gluten Free

Happy Valentine’s Day!!!  I hope you have a loved filled day.

I know many of you will be rushing off to have dinner with your honey tonight and need a quick meal solution for your little ones and the sitter.  My children love this meal and I love how quick it is (we ate it for lunch on Saturday).  The nutritional yeast acts as a great substitute for parmesian cheese…it makes the pasta sauce nice and creamy all without having to use dairy…good stuff!

INGREDIENTS

24 oz. jar Gia Russa Tomato Basil Pasta Sauce

1 box Ancient Harvest Quinoa Pasta (Rotelle) – Gluten Free

1/3 cup KAL Nutritional Yeast

1/4 – 1/3 cup fresh chopped basil

~

Begin by cooking the pasta

Boil the Water and Add the Pasta

While the pasta is cooking, chop the basil.

Wash and Stack the Basil
Roll the Basil

Roll the BasilSlice the BasilSeparate the Basil

When the pasta is done cooking, strain it and return it to the pot.
Strain the Pasta

Strain the Pasta

Add the Pasta Back to the Pot

Add the Pasta Back to the Pot

Add all of the remaining ingredients to the pot and mix well.

Add Remaining Ingredients

Add Remaining Ingredients

Thats it!  Garnish with some more nutritional yeast and basil.  Ask the kids to help prepare a side salad and dinner is done. 

Tomato Basil Pasta

Tomato Basil Pasta

For a printable version of this recipe click here.

2 Comments

Filed under Gluten Free, Main Dish, Recipes

SWEET VALENTINE – Raw Chocolate Peanut Butter Molten Cake

Raw Chocolate Peanut Butter Molten Cake

Raw Chocolate Peanut Butter Molten Cake

In daily life we really do want to minimize / eliminate sweets, but who can resist a little chocolate on Valentine’s Day?  Make this raw molten cake with peanut butter lava for your honey and I guarantee they will be feeling the love.  This is sooooooo yum!

INGREDIENTS – Makes 6 individual molten cakes

Cake

2 cups raw pecans (best result if frozen)

2/3 cup raw agave

1/2 cup raw cacao powder

1/2 cup coconut flour

Filling

1 Tbs. organic peanut butter for each cake

Toppings

Fun Fresh Foods chocolate agave nectar 

powdered sugar for dusting

fresh sliced bananas

~

Take the frozen pecans and place them in the food processor (I use a Cuisinart I purchased at Costco).  Turn on the processor and process until the nuts become meal.  Do not process too long or it will turn into nut butter.

Frozen Raw Pecans

Frozen Raw Pecans

Process Into a Meal

Process Into Meal

Pour the raw agave into the nuts while processing.  The nuts and agave will turn into batter.

Batter

Batter

Add the raw cacao and process to incorporate.  The processor will begin working very hard…you may have to stop and scrape down the bowl. 

Add the Cacao Powder

Add the Cacao Powder

Scrape Down the Sides

Scrape Down the Sides

When well mixed, take the batter out and transfer it to a bowl.  Wearing latex-type gloves (to avoid sticking), mix in the coconut flour with your hands.

Transfer to a Bowl

Transfer to a Bowl

Add the Coconut Flour

Add the Coconut Flour

Use Hands to Incorporate

Use Hands to Incorporate

Line your mini cake molds with saran wrap.

Mini Bundt Molds

Mini Bundt Molds

Line With Plastic Wrap

Line With Plastic Wrap

Once mixed well, use a 2 Tbs. ice cream scoop to fill each of the 6 molds.  Wrap the remaining cacao batter in Saran Wrap and place it as well as the filled molds in the fridge for 30 minutes to harden.

Scoop in Batter

Scoop in Batter

Wrap-up Remaining Batter and Chill

Wrap-up Remaining Batter and Chill

Once hardened take the molds out and wearing gloves press the batter into the molds making a well in the middle.  Make sure you spread the cacao mixture as evenly as possible so it dehydrates evenly.  Fill the wells with 1 Tbs. of organic peanut butter (or chocolate sauce). 

Press Into Molds Evenly Then Create Wells

Press Into Molds Evenly Then Create Wells

Add Filling (Peanut Butter or Chocolate)

Add Filling (Peanut Butter or Chocolate)

Take the remaining batter that was in plastic wrap out of the fridge and pinch off enough (approx. 1 Tbs.) to make a disc that will cover the bottom of each PB filled mold.  Gently press the disc onto the bottom of the filled cakes.

Shape Disc for Bottom

Shape Disc for Bottom

Ready to Chill Again

Ready to Chill Again

Put the cakes in the fridge for another hour to harden.  Keep the cakes in the fridge until 2 hours before you plan on serving them.

2 hours before serving time place the cakes on your dehydrator’s mesh tray and dehydrate for 2 hours (It takes longer than that for the Excalibur dehydrator get to 115°, so rest assured those enzymes will still be alive and kicking).

Place on Mesh Dehydrator Trays

Place on Mesh Dehydrator Trays

Dehydrated Cakes

Dehydrated Cakes

When the 2 hours is up you will notice that the cakes are no longer shiny, they will look matte as if they have been cooked.  Top each cake with some chocolate sauce, a very thin sprinkling of organic powdered sugar, and sliced bananas.  Serve IMMEDIATELY since these cakes are best warm…it will allow the peanut butter to ooze out when cut into.

Raw Chocolate Peanut Butter Molten Cake

Raw Chocolate Peanut Butter Molten Cake

I also made an all chocolate version using the Fun Fresh Foods chocolate agave nectar as the filling…topped with powdered sugar and strawberries!

Raw Chocolate Molten Cake

Raw Chocolate Molten Cake

For a printable version of this recipe click here.

3 Comments

Filed under Dessert, Gluten Free, Holiday, Nuts, Raw, Recipes, Vegan, Vegetarian

HEALTHY FRUIT SNACK KID’S LOVE

I am always looking for healthy snack alternatives for my family.  My children really love whole fruit on it’s own, but there are times when I want to send them to school with a chip alternative and these snacks serve that purpose.  My kids and husband love these.  What I love about them is their simplicity.  The apple cinnamon snacks are made with just that…apple and cinnamon.  I do wish that they offered more organic fruit crisps, but they do offer one, organic strawberry.

I just picked-up a pack of mixed freeze dried fruit snacks at Costco today.  My daughter was with me and saw them as we were doing our shopping, so we stocked-up again.

For more information about Brother’s All Natural click here.

One word of caution…I do not endorse buying their potato crisps because the sodium content is WAY too high!

Leave a comment

Filed under Gluten Free, Product Reviews, Vegan, Vegetarian

MAPLE ALMOND GRANOLA

Granola is so very easy to make and so yummy!  I definitely treat this granola as a “treat” due to the amount of maple syrup in it, but I really enjoy it when I do have it.  One of my favorite desserts is warm Chunky Crock Pot Applesauce topped with the Maple Almond Granola.

Years ago I got this Earthbound Farms Famous Maple Almond Granola recipe from the Costco Connection…it’s a real winner.  If you have kids, they will love to help you make this granola and will really enjoy getting their hands dirty!

I usually double the recipe below (i.e. 9 cups oats).  NOTE – If you double the recipe, it will take approximately 1 hour to 1 hour 15 minutes to cook.

INGREDIENTS
4-1/2 cups (18 ounces) old-fashioned rolled oats (not instant) (I buy Gluten Free Oats)
3/4 cup (3 ounces) raw sunflower seeds
1-1/2 cups coarsely chopped raw almonds
2 tablespoons ground cinnamon
1-1/4 cups pure maple syrup, preferably Grade A dark amber (I use 1 cup)
1/3 cup canola oil (I use coconut oil)
1 cup Earthbound Farm Organic raisins
I added 2/3 cup of shredded coconut
~

Position a rack in the center of the oven and preheat to 325 degrees F.

Place the oats, sunflower seeds, almonds, and cinnamon in a large bowl and stir to combine.

Dry Ingredients

Add the maple syrup and oil, and stir until all the dry ingredients are moistened.

Pour in the Wet Ingredients

Mix the Wet and Dry Ingredients

Mom and Daughter Kitchen Time

A Girl Has To Clean Her Hands!

Spread the granola on a 17 x 12 x 1-inch rimmed baking sheet. Bake until the granola begins to brown, about 25 minutes.

Put In The Oven

Stir the granola with a flat spatula and continue to cook until it’s light golden brown, dry, and fragrant, about 15 to 20 minutes more. Stir the granola at least once more, and watch it carefully during the final minutes because it can burn quickly (It will take longer to cook if doubling the recipe…mine takes about 45 minutes).

Mix Periodically While Cooking

Place the baking sheet on a cooling rack. Add the raisins and stir to combine, then allow the granola to cool completely.  I lay out the granola flat on my island to allow it to cool.

Add In The Raisins

All Mixed

Lay It Out to Cool and Crisp

Transfer the granola to an airtight container and store at room temperature for up to 1 month, or in the freezer for up to 3 months.

Homemade Granola

For a printable version of this recipe click here.

Cooking photos taken by photographer Tony Tseng

13 Comments

Filed under Breakfast, Dessert, Gluten Free, Grains, Kid Friendly, Recipes, Vegan, Vegetarian

VEGAN DIETS AND OSTEOPOROSIS

A question I often hear from people curious about my plant based diet is, “How do you guard against osteoporosis without drinking milk?”

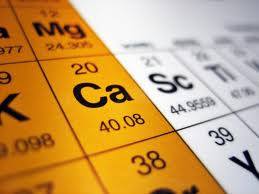
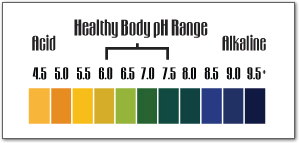
There is a widely unknown concept in our society called Acid / Alkaline balance that refers to the pH levels of our body’s tissues and fluids.  Our body wants to maintain a slightly alkaline state to support the fact that our blood NEEDS to maintain a pH of 7.35-7.45 (according to www.medicinenet.com ).  When our blood becomes too acidic, our body is forced to leach minerals from our bones such as calcium and magnesium to correct the unbalance.

Dairy is highly acidic as are all animal products and refined foods.  Ironically, when you consume dairy, despite the fact that it contains high levels of calcium, the resulting acidification of your blood results in a net loss of calcium as your body is compelled to buffer the acid by drawing the calcium out of your bones.

It is for these reasons that a plant-based diet is the best defense against osteoporosis.  Vegetables are highly alkaline foods.  Fortunately leafy green vegetables are the best sources of dietary calcium.  Luckily the calcium in vegetables is highly absorbable due to vegetable’s alkaline status.  When we consume vegetables our blood pH remains alkaline resulting in our body’s ability to fortify its calcium stores.

It is time we come back to the generation’s old wisdom, “EAT YOUR VEGGIES!”

For a list of calcium rich vegetables click here.

Top image courtesy of healthrecon.com

Bottom image courtesy of qubeewater.com

1 Comment

Filed under Education, Osteoporosis, pH

MUNG BEAN NOODLE SOUP – With Miso Broth

Mung Bean Noodle Soup

Mung Bean Noodle Soup

I am a big soup fan.  A few nights ago when we were getting ready to go on our ski trip to Mammoth, I needed to make dinner with the food we had on hand…I wanted to try and minimize what we had to leave in the fridge.  Noodle soup is always a good option.  I keep mung bean noodles (also known as Saifun Noodles) in the pantry for nights like those. Usually each package of dry noodles comes with three bundles of noodles inside, so they pack a big punch for a small cost.

I didn’t have any broth in the pantry, but I did have some outstanding miso in the fridge from South River Miso Company, so that became the basis of my soup broth.  South River Miso is a great small company that really focuses on quality and their products are really special.  To find out more about their company and order their products click here.

South River Miso

South River Miso

INGREDIENTS

Mung Bean Noodles (1 bundle per adult / half for each kid)

Broth of your choice

Vegetables of your choosing (i.e. onion, green onion, leek, spinach, kale, mushrooms, bean sprouts, basil, cilantro, jalapeno, sea veggies)

Accompaniments (Guilin Chili Sauce, sesame oil, tamari, Sriracha, white pepper)

~

I begin by soaking the mung bean bundles in hot water.

Dry Mung Bean Noodles

Dry Mung Bean Noodles

Pour Hot Water Over Noodles

Pour Hot Water Over Noodles

I tend to make a very mild broth with the intent that people will personalize their soup at the table.  Our family’s taste tends to cover the whole spectrum from very mild to crazy spicy! To make the broth this time I boiled water and added leeks to it for flavor.

Cut the Leeks Lengthwise and Clean

Cut the Leeks Lengthwise and Clean

Water With Leeks

Water With Leeks

Once the leeks have flavored the broth, ladle some hot water into a bowl and mix the miso paste into the water in the bowl.


Hot Water

Hot Water

Add the Miso Paste

Add the Miso Paste

Pour the miso mixture back into the hot water and leeks.


Add the Miso Mixture Back In

Add the Miso Mixture Back In

Flavor with tamari if needed.


Add Tamari If Needed

Add Tamari If Needed

Now prepare the bowls for the soup.


Put Raw Sliced Onions and Spinach Into Bowls

Put Raw Sliced Onions and Spinach Into Bowls

Add the soaked noodles.


Soaked Noodles

Soaked Noodles

Bowls With Noodles

Bowls With Noodles

Add a TINY Splash of Sesame OIl For Taste

Add a TINY Splash of Sesame OIl For Taste

Pour the boiling hot prepared broth over the noodles and cover for a few minutes.  The hot broth will cook the onion and spinach.


Covered Soup Bowls...Cooking the Veggies

Covered Soup Bowls...Cooking the Veggies

Now serve with the accompaniments.


Soup Toppings

Soup Toppings

Sauce and Spice Close-up

Sauce and Spice Close-up

Flavor your soup and enjoy.  I was in a kale mood, so I completely covered my soup with kale before I put the broth in and covered it with a lid.


My Soup Bowl

My Soup Bowl

6 Comments

Filed under Gluten Free, Main Dish, Recipes, Soup, Vegan, Vegetables, Vegetarian

PEANUT BUTTER CRISP BARS

Peanut Butter Crisp Bars

Peanut Butter Crisp Bars

These bars are favorites in our house for the occasional treat…my nephew ate three of them the last time I made them and was going for a fourth when I had to rain on his parade and say “NO MORE” (while inside I was secretly jumping for joy that they were such a hit!).  Since they are sweetened with brown rice syrup, they are technically healthier than other bars, but please remember that they are still treats.

INGREDIENTS

2/3 cup brown rice syrup

2/3 cup peanut butter (or other nut butter)

2 Tbs. coconut oil

4 cups Arrowhead Mills puffed cereal (I used puffed millet and rice)

1/3 cup shredded coconut

1/3 cup carob chips (or vegan chocolate chips)

1/3 cup chopped nuts

cinnamon to taste (optional…I left it out this time)

Ingredients

Ingredients

Lightly grease a bread pan or casserole.  You can really use any pan you’d like.  If you like to have thicker bars, use a smaller pan.  I chose to use a large casserole so I would have thinner bars.

Grease the Dish

Grease the Dish

Pour the puffed cereal into a large mixing bowl.

In a saucepan combine the rice syrup, nut butter, coconut oil, and cinnamon (if using).  Whisk the ingredients together on low-medium heat until everything melts together to form a sauce.  You do not need to bring the sauce to a boil, simply warm it.

Coconut Oil, Nut Butter, & Brown Rice Syrup

Coconut Oil, Nut Butter, & Brown Rice Syrup

Sauce

Sauce

Pour the sauce over the puffed cereal and stir to combine.

Pour Sauce into Puffed Cereal

Pour Sauce into Puffed Cereal

Mix to Combine

Mix to Combine

Once evenly combined, add the shredded coconut and combine well.

Add Coconut & Mix

Add Coconut & Mix

Next, add the nuts and do the same.

Add Nuts & Mix

Add Nuts & Mix

Finally, add the carob chips and combine well (the mixture should be cooled enough by this point to prevent the carob chips from melting).

Add Carob Chips & Mix

Add Carob Chips & Mix

Pour the mixture into the greased casserole and press firmly to pack it in evenly throughout the casserole.

Pour into Casserole

Pour into Casserole

Press Firmly & Evenly

Press Firmly & Evenly

Place the casserole into the refrigerator for 30 minutes to firm-up.

Refrigerate to Firm

Refrigerate to Firm

Once firm, cut into bars.  I often make a large batch and wrap each bar separately for storage in the freezer.

Peanut Butter Crisp Bars

Peanut Butter Crisp Bars

For a printable version of this recipe click here.

1 Comment

Filed under Dessert, Gluten Free, Recipes, Vegan, Vegetarian

TRAVELING AND FOOD – My Methods

Photo Courtesy of Mammothmountain.com

Photo Courtesy of Mammothmountain.com

I love to travel, but no matter how much I enjoy traveling, doing so is stressful…the packing, running to catch a plane or being in closed quarters in the car for hours, making sure the kids are ok, etc.  The last thing I want to do is get sick on a trip or come home from a trip with a cold as a souvenir.

So…there are a few things I do to ensure that I stay well.  On our last skiing trip to Mammoth two of the pieces of luggage that accompanied us were coolers.  There are of course times when it is possible to pack for every meal, but on this trip I knew I would be limited to a mini-bar fridge.  Since I knew my storage options were limited, I chose to bring the most nutrient dense foods possible to balance the restaurant food I knew I would be eating.

Green juice and green smoothies were on the top of my list.  When I got to the Westin Monache, they went straight into the mini-bar freezer.  Each night before bed I would take them out of the freezer and they were thawed and ready for me in the morning.

My Green Smoothies & Green Juice

My Green Smoothies & Green Juice

I also brought a healthy dinner of veggie soup, kale salad, and fresh baked bread.  I myself will probably stick to the soup and salad.  I don’t know about you, but my family is usually too tired to go out to dinner on the first night of skiing, so I always like to bring a healthy dinner with us if possible.

Our After Skiing Meal (veggie soup, kale salad, bread...no bread for me)

Our After Skiing Meal (veggie soup, kale salad, bread...no bread for me)

When I made the soup a home I vacuum packed it and froze it flat.  The soup was then able to act as my “ice” for the cooler and thus did not waste space.  It doesn’t look very appetizing in the picture below, but trust me, it was yummy!

Vacuum Packed Frozen Veggie Soup

Vacuum Packed Frozen Veggie Soup

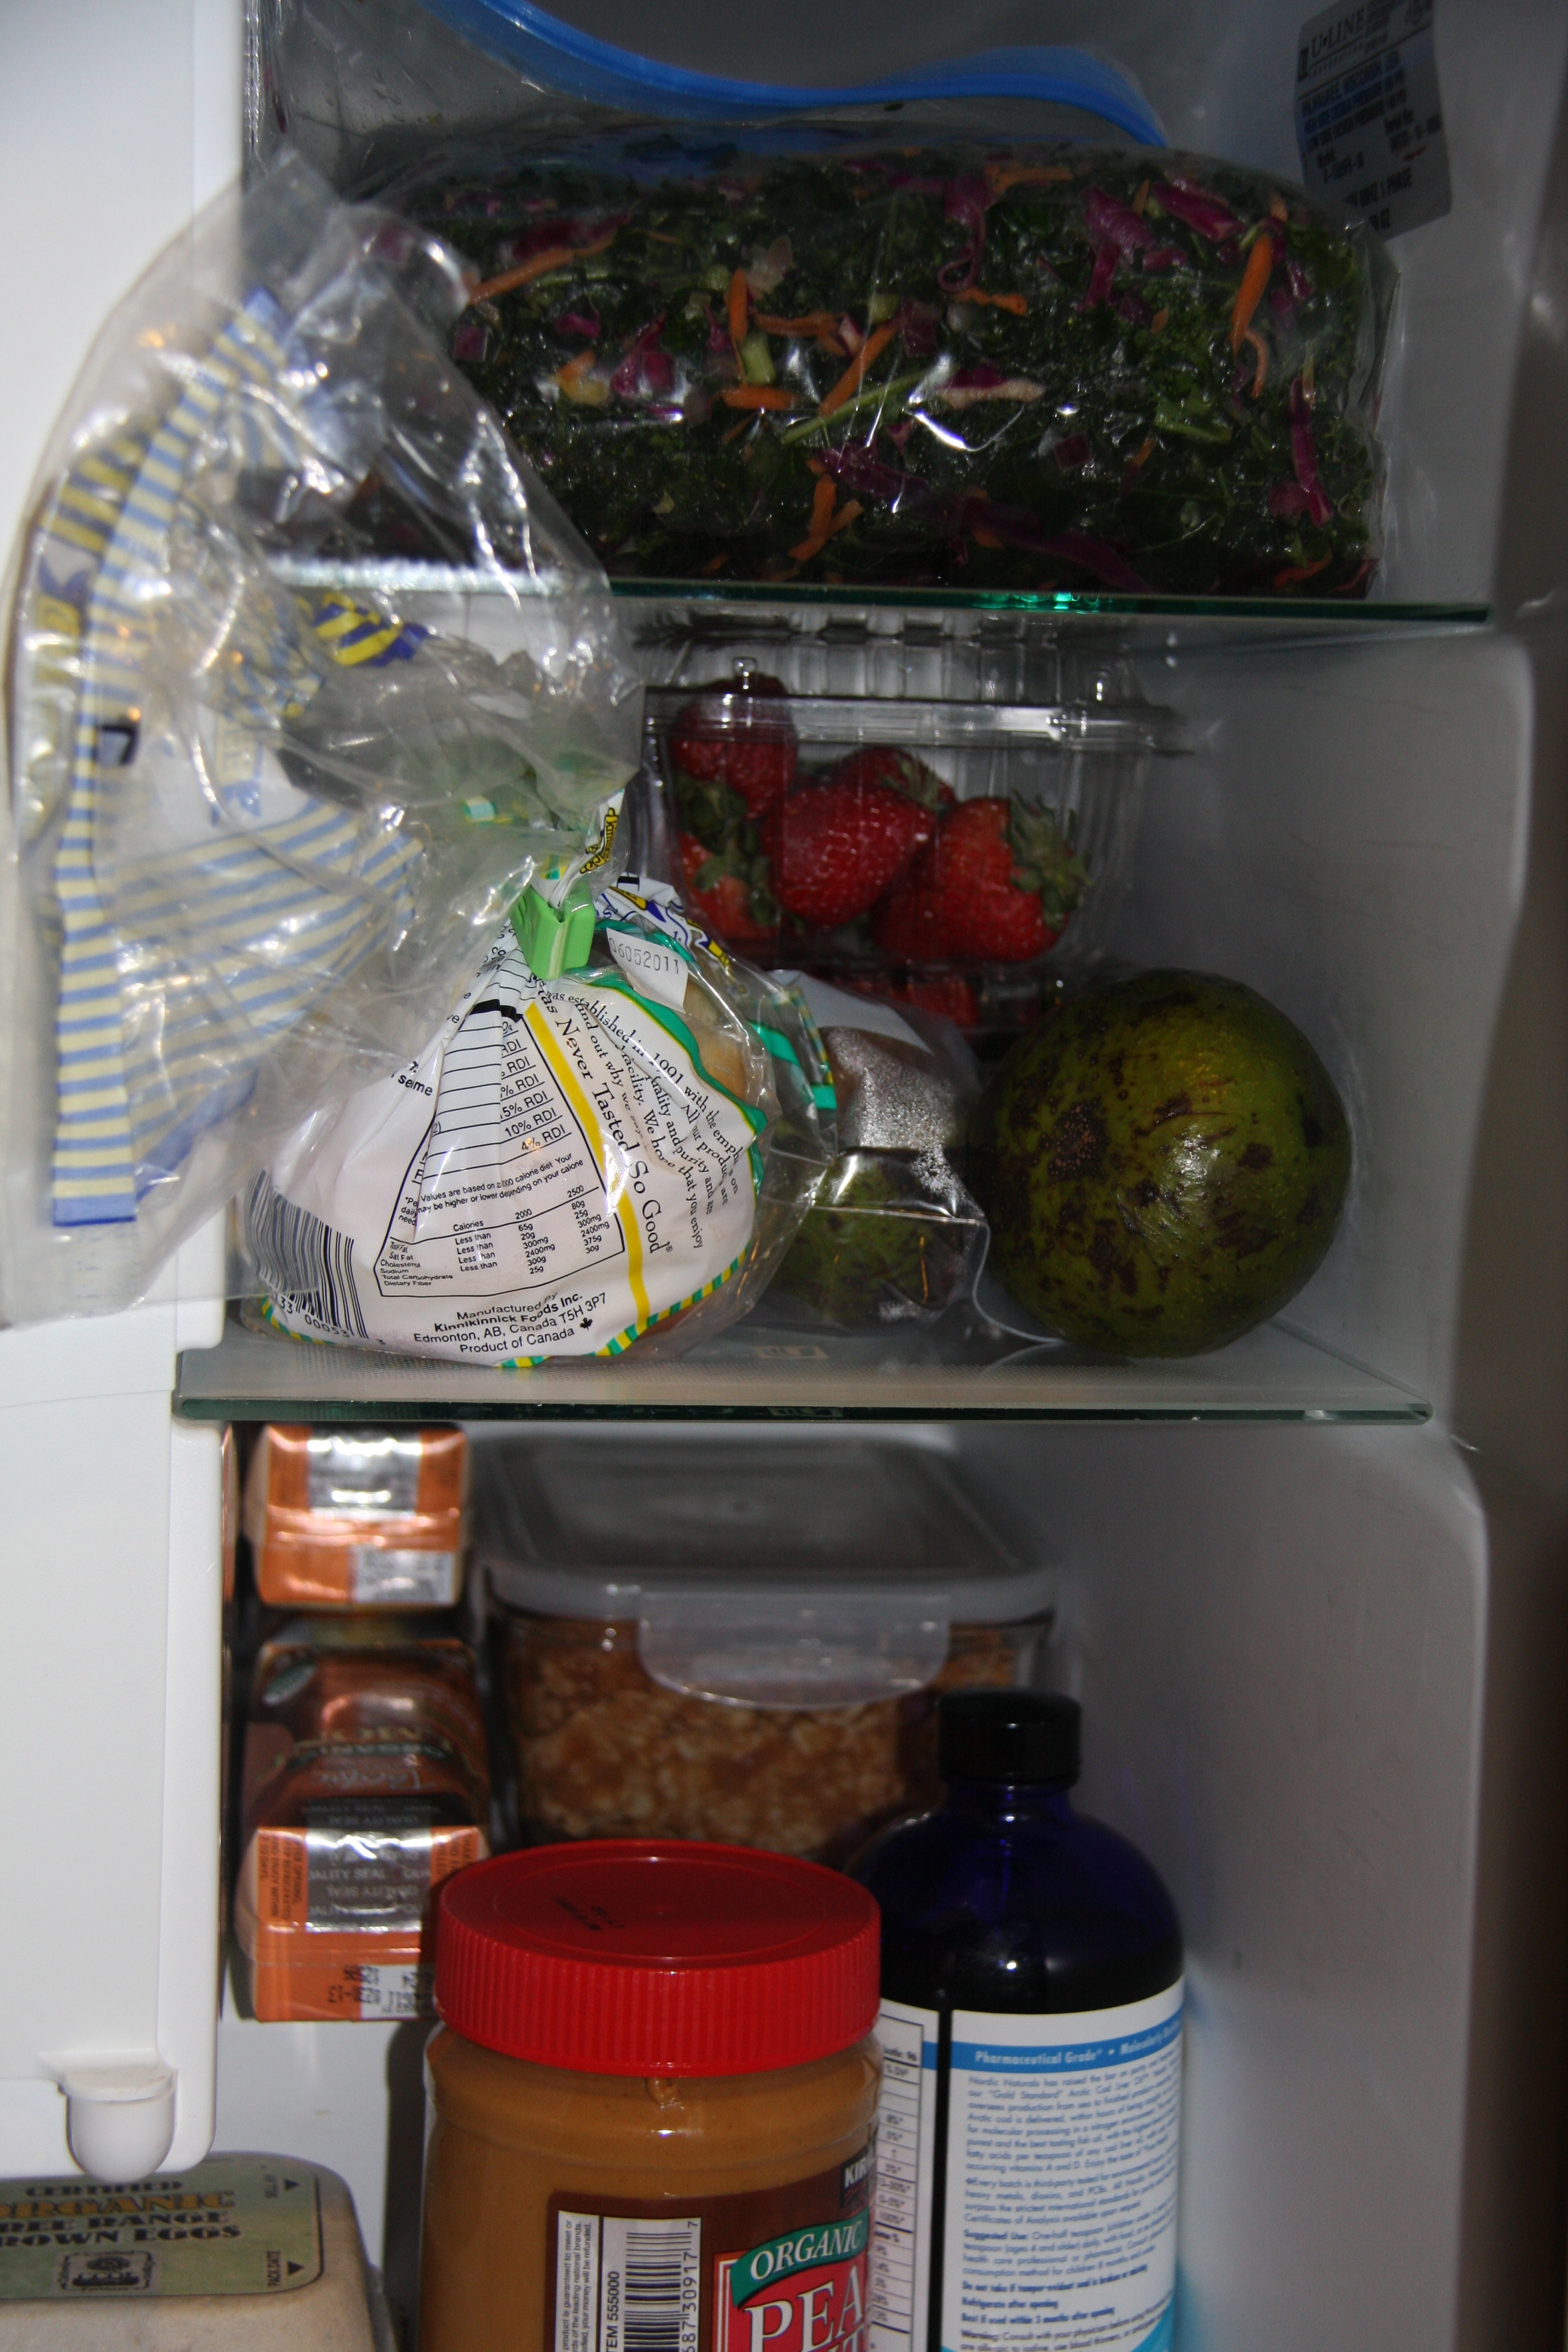
You would be amazed what you can pack into a mini-fridge.  My fridge has eggs, whole wheat tortillas, Daiya cheese, kale salad (the soup is still in the cooler), prepared oatmeal, peanut butter, gluten free bread, gluten free rolls,  coconut water, almond milk, green juice and smoothies (in the freezer section), avocados, blueberries, and strawberries.

Packed Mini-Fridge

Packed Mini-Fridge

Close-up of Packed Mini-Fridge

Close-up of Packed Mini-Fridge

The next time you go on a road trip, don’t forget to bring your powerhouse foods!

Of course traveling by plane changes it a bit, but I have tips for that too…more on that later.

3 Comments

Filed under Education, Travel, Vegan, Vegetarian

Vegan Junk Food: Blessing or Curse?


Photo Credit: Penguincake

Photo Credit: Penguincake

This is the most recent post written by Brenda Davis, RD, on Crazy Sexy Life.  Vegan junk food has become a huge problem in that people believe that if it is vegan/vegetarian, it must be healthy.  Let me tell ya… junk food is junk food. – Gretchen

Brenda Davis, RD, is co-author of seven books, including “Becoming Vegan,” “The Raw Food Revolution Diet,” and “Defeating Diabetes.” Brenda is the lead dietitian in a diabetes intervention project in Majuro, Marshall Islands and is a past chair of the Vegetarian Nutrition Dietetic Practice Group of the American Dietetic Association.

Many people assume that becoming vegan means giving up donuts, cheesecake, s’mores, gummy bears, ice cream bars, cheezies, chicken wings, cheeseburgers and every other favorite treat imaginable. Twenty years ago, they would have been right. Today, they’d be dead wrong. Vegan versions of almost every convenience food, snack food and fast food are now yours for the taking. It is wonderful and horrible all at the same time. On the one hand, it is a bit of a relief to know that you can provide your child with a “reasonable look-alike” when their friends are enjoying ice cream bars on a hot summer day or roasting marshmallows at their highly anticipated class camp out. On the other hand, if you get a little too cozy with these processed foods you could end up with a vegan diet that is as bad as the Standard American Diet (SAD) that we’re so determined to avoid.

In this hectic world of multitasking, convenience foods have an undeniable attraction. While popping a veggie pie in the microwave is no doubt faster than preparing dinner from scratch, you have to consider the cost of cutting corners with the raw materials used to replace your brain cells (and the rest of your body!). Processed, packaged foods are carefully designed to tantalize your taste buds and keep you coming back for more. This task is cleverly accomplished with salt, sugar and fat, all of which have a nasty way of coming back to bite you in the butt.

Not so long ago, most people had no clue what the word vegan meant. Those that recognized the word associated it with extreme, dangerous vegetarian diets. Today, the word vegan is viewed in a far more flattering light. This shift is the direct result of a couple of decades of scientific evidence confirming the safety, adequacy and potential benefits of a well-planned vegan diet. You can walk into any mainstream grocery store and find products with the word vegan prominently displayed across the label. Producers use the word vegan to sell goods because consumers associate this word with wholesome, nutritious, ethical and green. Many assume that foods baring the “v” word are nutritionally beyond reproach. Don’t be fooled. Just because you see the word vegan on a label does not automatically qualify the item as healthful. Nor does it qualify the food as low-calorie, low-fat, low-sugar or “low” anything. Some of the world’s most unhealthful foods are 100% vegan – soda pop and deep-fried salty snacks being two perfect examples.

What does this all mean when it comes to our food choices? Can you afford to eat any of the tempting treats sitting on natural-food store shelves? While you don’t have to completely eschew the tasty convenience foods that are appearing in ever-increasing numbers, you best be savvy about where on the health food spectrum these foods really lie. The following guidelines will help you sort the proverbial wheat from the chaff.

1. Eat mainly whole plant foods – vegetables, fruits, legumes, whole grains, nuts and seeds. Make these foods the centerpieces of all your meals. Go for at least 10 servings of vegetables and fruits, including at least three servings of leafy greens, each day.

2. If you eat vegan convenience foods, do so in moderation. Frozen entrees, veggie meats, frozen whole grain waffles, packaged mixes, and the like can offer variety and enjoyment, but they should not become dietary staples. These foods tend to be high in salt and sugar and are sometimes exposed to harsh chemicals in their processing.

3. If you eat vegan snack foods and fast foods, do so in moderation. Foods that fall into this category include vegan hot dogs, ice cream, candy bars and sweet baked goods containing white flour and/or sugar.

4. If you use soy foods, stick to organic, first generation soy products such as edamame, roasted soybeans, baked soybeans, tofu, tempeh and soymilk. Minimize highly processed soy foods, especially those based on isolated soy protein or soy oil.

5. Learn to read labels! While the nutrition facts give you a lot of valuable information about salt, sugar, fat and nutrient content, the ingredient list is every bit as important. Ingredients are listed by weight, so whatever appears first is present in the greatest quantity. Take note of the sources of fat, sugar and protein in the product.

6. Make sure you take care of the nutrients of concern – particularly vitamin B12, but also vitamin D, calcium, iron, zinc, iodine and essential fatty acids. Ignoring these nutrients can erode most of the advantages enjoyed on a whole-foods vegan diet.

To read this post directly on Crazy Sexy Life click here.

Leave a comment

Filed under Education, Junk Food, Vegan, Vegetarian

KALE AND POTATO GRATIN WITH KALE PESTO – Guest Blog by Mission Delectable


Kirsten of Mission Delectable

Kirsten of Mission Delectable

Today we have a guest blog from Kirsten of Mission Delectable

Mission Delectable is a blog about delicious, homemade food, and about my eating adventures in San Francisco. My goal here (or, should I say, mission) is to make satisfying recipes that you can realistically cook on weekday nights after work—plus more involved recipes for when you’re feeling adventurous and/or have a little free time on the weekend. Most of what I make is seasonal and vegetarian. I’m not, however, a vegetarian. I just love fresh, seasonal vegetables, and also consciously try to eat less meat.

Kale Potato Gratin With Kale Pesto

Kale Potato Gratin With Kale Pesto

Back in December, I made a rich, hearty, and very delicious gratin with chard, potatoes, and caramelized onions. Sure, this dish also has potatoes and winter greens. And sure, this dish is also a gratin. But while last month’s gratin was super rich and creamy, this gratin is light and bright. This month’s gratin is last month’s vivacious little sister, on a diet.

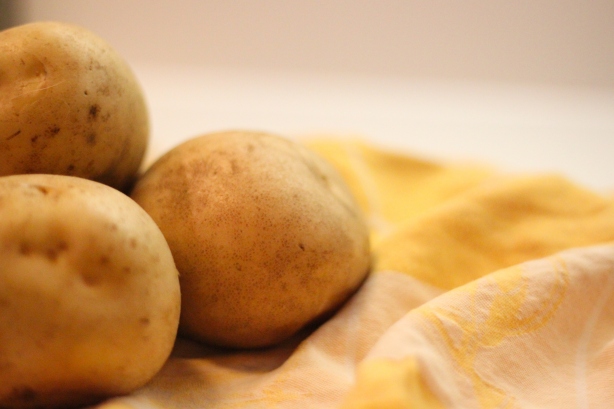
Potatoes

Potatoes

Thinly Slice the Potatoes

Thinly Slice the Potatoes

Well, not a huge diet—we’re not trying to deprive ourselves here, people. But it does cut out the heavy cream, eliminates the cheese, and keeps the olive oil to a minimum, all while remaining delectable and satisfying. The result? Something you can make and enjoy—without guilt—any day of the week. Sign me up.

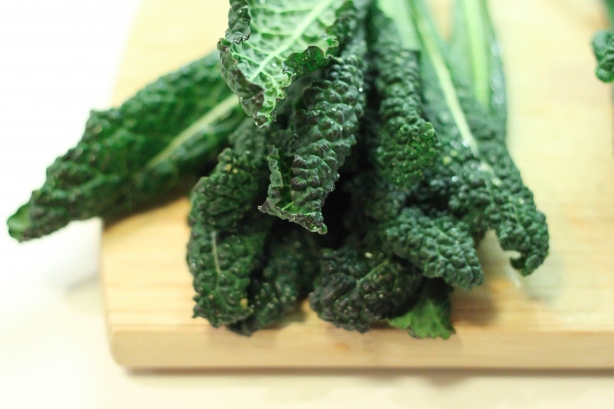
Kale

Kale

Chopped Kale

Chopped Kale

The genesis of this dish was an ill-fated—i.e., disastrous—attempt at making Gourmet’s Potato & Kale Galette a few months back. What can I say? The whole process of cooking this thing just did not work out for me. The worst part was when I came to this step:

“Wearing oven mitts, carefully slide galette onto a baking sheet and invert skillet over it. Holding them together, invert galette, browned side up, back into skillet.”

Make the Kale Pesto

Make the Kale Pesto

Kale Pesto

Kale Pesto

You’re literally supposed to dump this very loose, flimsy “galette” onto a baking sheet, and then perfectly invert it back in the pan. Does this work? Not very well. Not for me, at least. At the same time, the final result—which, I promise you, wasn’t pretty—was missing something. It needed some acid. Some texture. A whole lot less butter. I remember thinking that it would be way more delectable if it took a little inspiration from this gratin. Add a little lemon for acid. Red pepper flakes for heat. Bread crumbs for texture. Plus, a unique pesto (instead of all that butter) to add moisture and round the whole thing out.

Sautee the Kale

Sautee the Kale

Assemble the Gratin

Assemble the Gratin

And that’s how this recipe was born. Oh is it ever a good one.

Kale Potato Gratin

Kale Potato Gratin

KALE & POTATO GRATIN WITH KALE PESTO

Inspired by Gourmet and 101 Cookbooks

Serves 4

2 bunches of kale
2 lbs yukon gold potatoes, peeled and thinly sliced
lemon (zest and juice)
3 medium garlic cloves
1 cup homemade breadcrumbs (approximate)*
1 tablespoon butter
red pepper flakes
salt & pepper

Preheat the oven to 400F.

Meanwhile, wash the kale, remove the tough stems and ribs, and coarsely chop. Reserve 1.5 cups of the chopped kale to make the pesto (see below). In a large nonstick skillet, over medium-high heat, add a couple slashes of olive oil, 2 cloves of garlic (minced), and cook until fragrant, about 1 minute. Add the chopped kale to the pan, along with a couple pinches of salt, a pinch of red pepper flakes, and a couple grinds of black pepper (all to taste). Toss everything together, and cook until the kale is just wilted, about 3-5 minutes). Remove from heat, and set aside until you’re ready to assemble the gratin.

Make the kale pesto. In a food processor, combine 1 clove garlic, the reserved 1.5 cups of chopped kale, and some salt and pepper (to taste). Process until everything is coarsely chopped. Drizzle in a 1/4 cup of olive oil, and process until fully incorporated and smooth. Set aside.

Make your breadcrumbs (if you don’t already have homemade ones on hand). Remove the crusts from a few slices of day-old rustic bread; tear into pieces, toss in the food processor, and pulse until coarse crumbs are formed. Melt 1 tablespoon of butter in a small pan. Remove from heat, and stir in the breadcrumbs, along with a pinch of salt, until the crumbs are lightly coated in the butter. Set aside.

Now you’re ready to assemble the gratin. Lightly oil your baking pan or gratin dish. Arrange 1/3 of the potato slices in a slightly overlapping layer, and sprinkle with salt and pepper. In this order, top the potatoes with 2-3 tablespoons of the kale pesto (approximately 1/4 of the pesto), and then 1/2 of the sautéed kale. Sprinkle 1 teaspoon of lemon zest over the kale. Arrange another 1/3 of the potatoes on top, and sprinkle with salt and pepper. Top with 2-3 tablespoons of the kale pesto, the last of the sautéed kale, and another teaspoon of lemon zest. Arrange the final layer of potatoes on top, and sprinkle with salt and pepper. Top with 2-3 more tablespoons of kale pesto and, finally, the breadcrumbs. You should have several tablespoons of kale pesto leftover for garnish—stir approximately 1 tablespoon of lemon juice into the leftover kale pesto, and set aside until the gratin is done baking.

Bake the gratin at 400F for 40-50 minutes, until the potatoes are cooked through and the breadcrumbs are golden brown. Let cool for 10 minutes before serving. Top each serving of gratin with a drizzle of the kale pesto.

For a printable version of this recipe click here.

2 Comments

Filed under Guest Blog, Main Dish, Recipes, Sides, Vegan, Vegetables, Vegetarian