Category Archives: Quick

Frozen Chocolate Covered Bananas

Healthy Chocolate Covered Bananas Balanced Grettie Fitquestmom

Over the Memorial Day Weekend we went to a BBQ at a friend’s house and I was tasked with bringing a healthy-ish dessert.

Frozen chocolate covered bananas were always my favorite Disneyland treat and I think it is because that was the only place I ever saw them when I was younger.  I had a MASSIVE sweet tooth, yet I would choose those every time over a Mickey ice cream sandwich or the other fun ice cream treats they sold.

I thought that chocolate covered frozen bananas would fit the bill and would be fun for my daughter and I to make together.  She is the age now where I am wanting to give her more freedom in the kitchen and this was the perfect recipe for that.

This dessert ended-up being a hit with kids and adults alike…I’m pretty sure they will make a regular appearance this summer.

INGREDIENTS

  • Ripe Bananas (not too ripe though)
  • Popsicle sticks
  • Chocolate chips for melting (I used Enjoy Life brand)
  • Various toppings
    • Trail mix (we chopped ours up in the blender)
    • Nuts
    • Mini marshmallows
    • Raisins
    • Cereal
    • Sprinkles
    • Coarse sugar

METHOD

  1. Cut bananas into 3″ slices
  2. Stick a Popsicle stick into each banana piece
  3. Place the banana pieces on a cookie sheet and freeze for an hour or longer
  4. Melt the chocolate chips (I used the double boiler method)
  5. Coat each frozen banana with the melted chocolate and immediately sprinkle on the toppings (the chocolate will harden FAST)
  6. Lay the finished product back on the cookie sheet and into the freezer until ready to serve

What’s your favorite healthy-ish summertime dessert???

2 Comments

Filed under Dessert, Frozen Treats, Fruit, Gluten Free, Holiday, Ice Cream, Kid Friendly, Quick, Recipes, Sorbet, Vegan

Cauliflower Oats

Cauliflower Oats FitQuest FitQuestMom
One of my nutrition clients was just mentioning how much she loves the cauliflower oats I posted about on my Instagram page and thought I would share it with all of you.  I know it sounds weird, but you really don’t taste the cauliflower at all and it majorly ups the volume!  I also like to mix riced cauliflower (HERE’s how to make it…you can also buy it at Trader Joe’s) in with rice because again, it ups the volume you get to eat and you primarily taste the rice.
You can use different amounts based upon the macros you have available to you, but here is an example of how I like it:
INGREDIENTS
1/2c oats
1 1/2c water
2/3c riced cauliflower (I put it in raw)
1/3-1/2c egg whites (optional, but a great way to get more protein in)
Toppings: Nut butter (Crazy Richards is my favorite*, fruit, shredded coconut, raisins, dried fruit, OR go the savory route and top with veggies and protein, hot sauce, etc.
METHOD
Cook the oats, water, and cauliflower on the stove over medium/high heat until it comes to a boil.  Once boiling, reduce the heat to low and cook until your desired level of thickness.
Whisk in the egg whites and cook for another minute. Turn off the heat, put the lid on, and let it sit on the stove until you are ready to eat it.
Oftentimes I will make the oats at lunchtime and then will leave them on the stove with the lid on and not eat them until after dinner.
If you know you won’t be eating them for a long time, obviously store the cauli-oats in the fridge.
* Get 10% off your Crazy Richard’s order with code: FITQUESTMOM

1 Comment

Filed under Breakfast, Dessert, Gluten Free, Grains, IIFYM and Macros, Nutrition, Quick, Recipe Redux, Recipes, Vegan, Vegetarian

PB CUP / FUDGE RECIPE – Healthy Halloween Candy

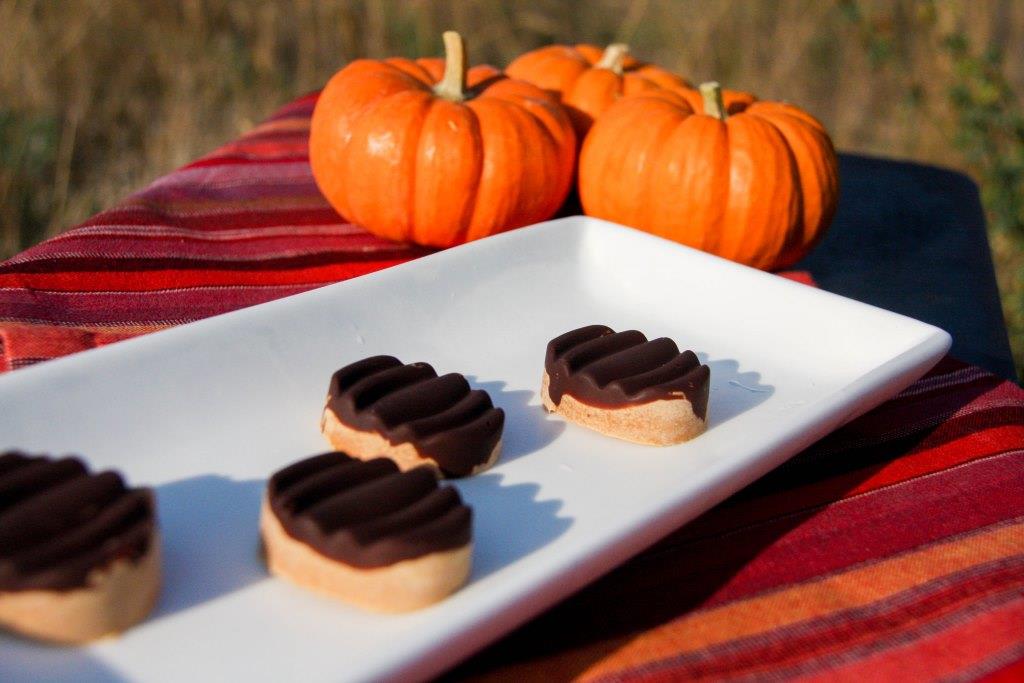
Healthy Peanut Butter Chocolate Pumpkin PB 4

I teamed-up with Nuts.com in an attempt to make Halloween less scary for your waistline.  Nuts.com has been working hard on their Healthy Snack Page and I am happy to help spread the word.

Of course when you think of Nuts.com you think of nuts.  One of the world’s best flavor combos in my opinion is PB and C.  Who doesn’t love peanut butter and chocolate (other than my very own daughter…what???).

I set off on a quest to make a healthier peanut butter cup / peanut butter fudge and the results taste amazing if I do say so myself.  My son offered to eat all of them (such a kind boy).  What’s even more awesome is how quickly these come together.

It’s up to you whether or not you add chocolate.  These cups / fudge taste great either way.

INGREDIENTS – Makes 10 

40g dark chocolate

2Tbs (28g) raw cacao butter

1/4c (64g) peanut butter (crunchy or smooth)

1/4c (24g) peanut butter powder

1/2 dropperful Liquid Sweetleaf Stevia (English Toffee flavor is my favorite)

Method

If using the chocolate, place 4 grams of chocolate into each of the 10 candy molds (I used THIS one).  Microwave in 15 second increments to melt (you have to be REALLY careful not to burn the chocolate in the microwave).  Once sufficiently melted, spread the chocolate and place the mold into the freezer.

In a double boiler melt the cacao butter, chocolate, and peanut butter powder stirring constantly with a whisk.

Once melted, remove the molds from the freezer and divide the peanut butter mixture evenly between the 10 candy molds.

Place the candies in the fridge to set-up.  Store uneaten candies (if there are any) in the fridge or freezer.

Nutrition Information:

Per Candy (Chocolate & PB) – 82 cal / 2.7C / 3P / 6.8F

Per Candy (Just PB Mixture) – 75 cal / 1.8C / 2.8P / 6.3F

Healthy Peanut Butter Chocolate Pumpkin PB 5

Leave a comment

Filed under Candy / Fudge, Dessert, Gluten Free, Holiday, Kid Friendly, Nuts, Quick, Recipe Redux, Recipes, Vegan, Vegetarian

My Favorite Gluten-Free Lower Carb Waffle Recipe

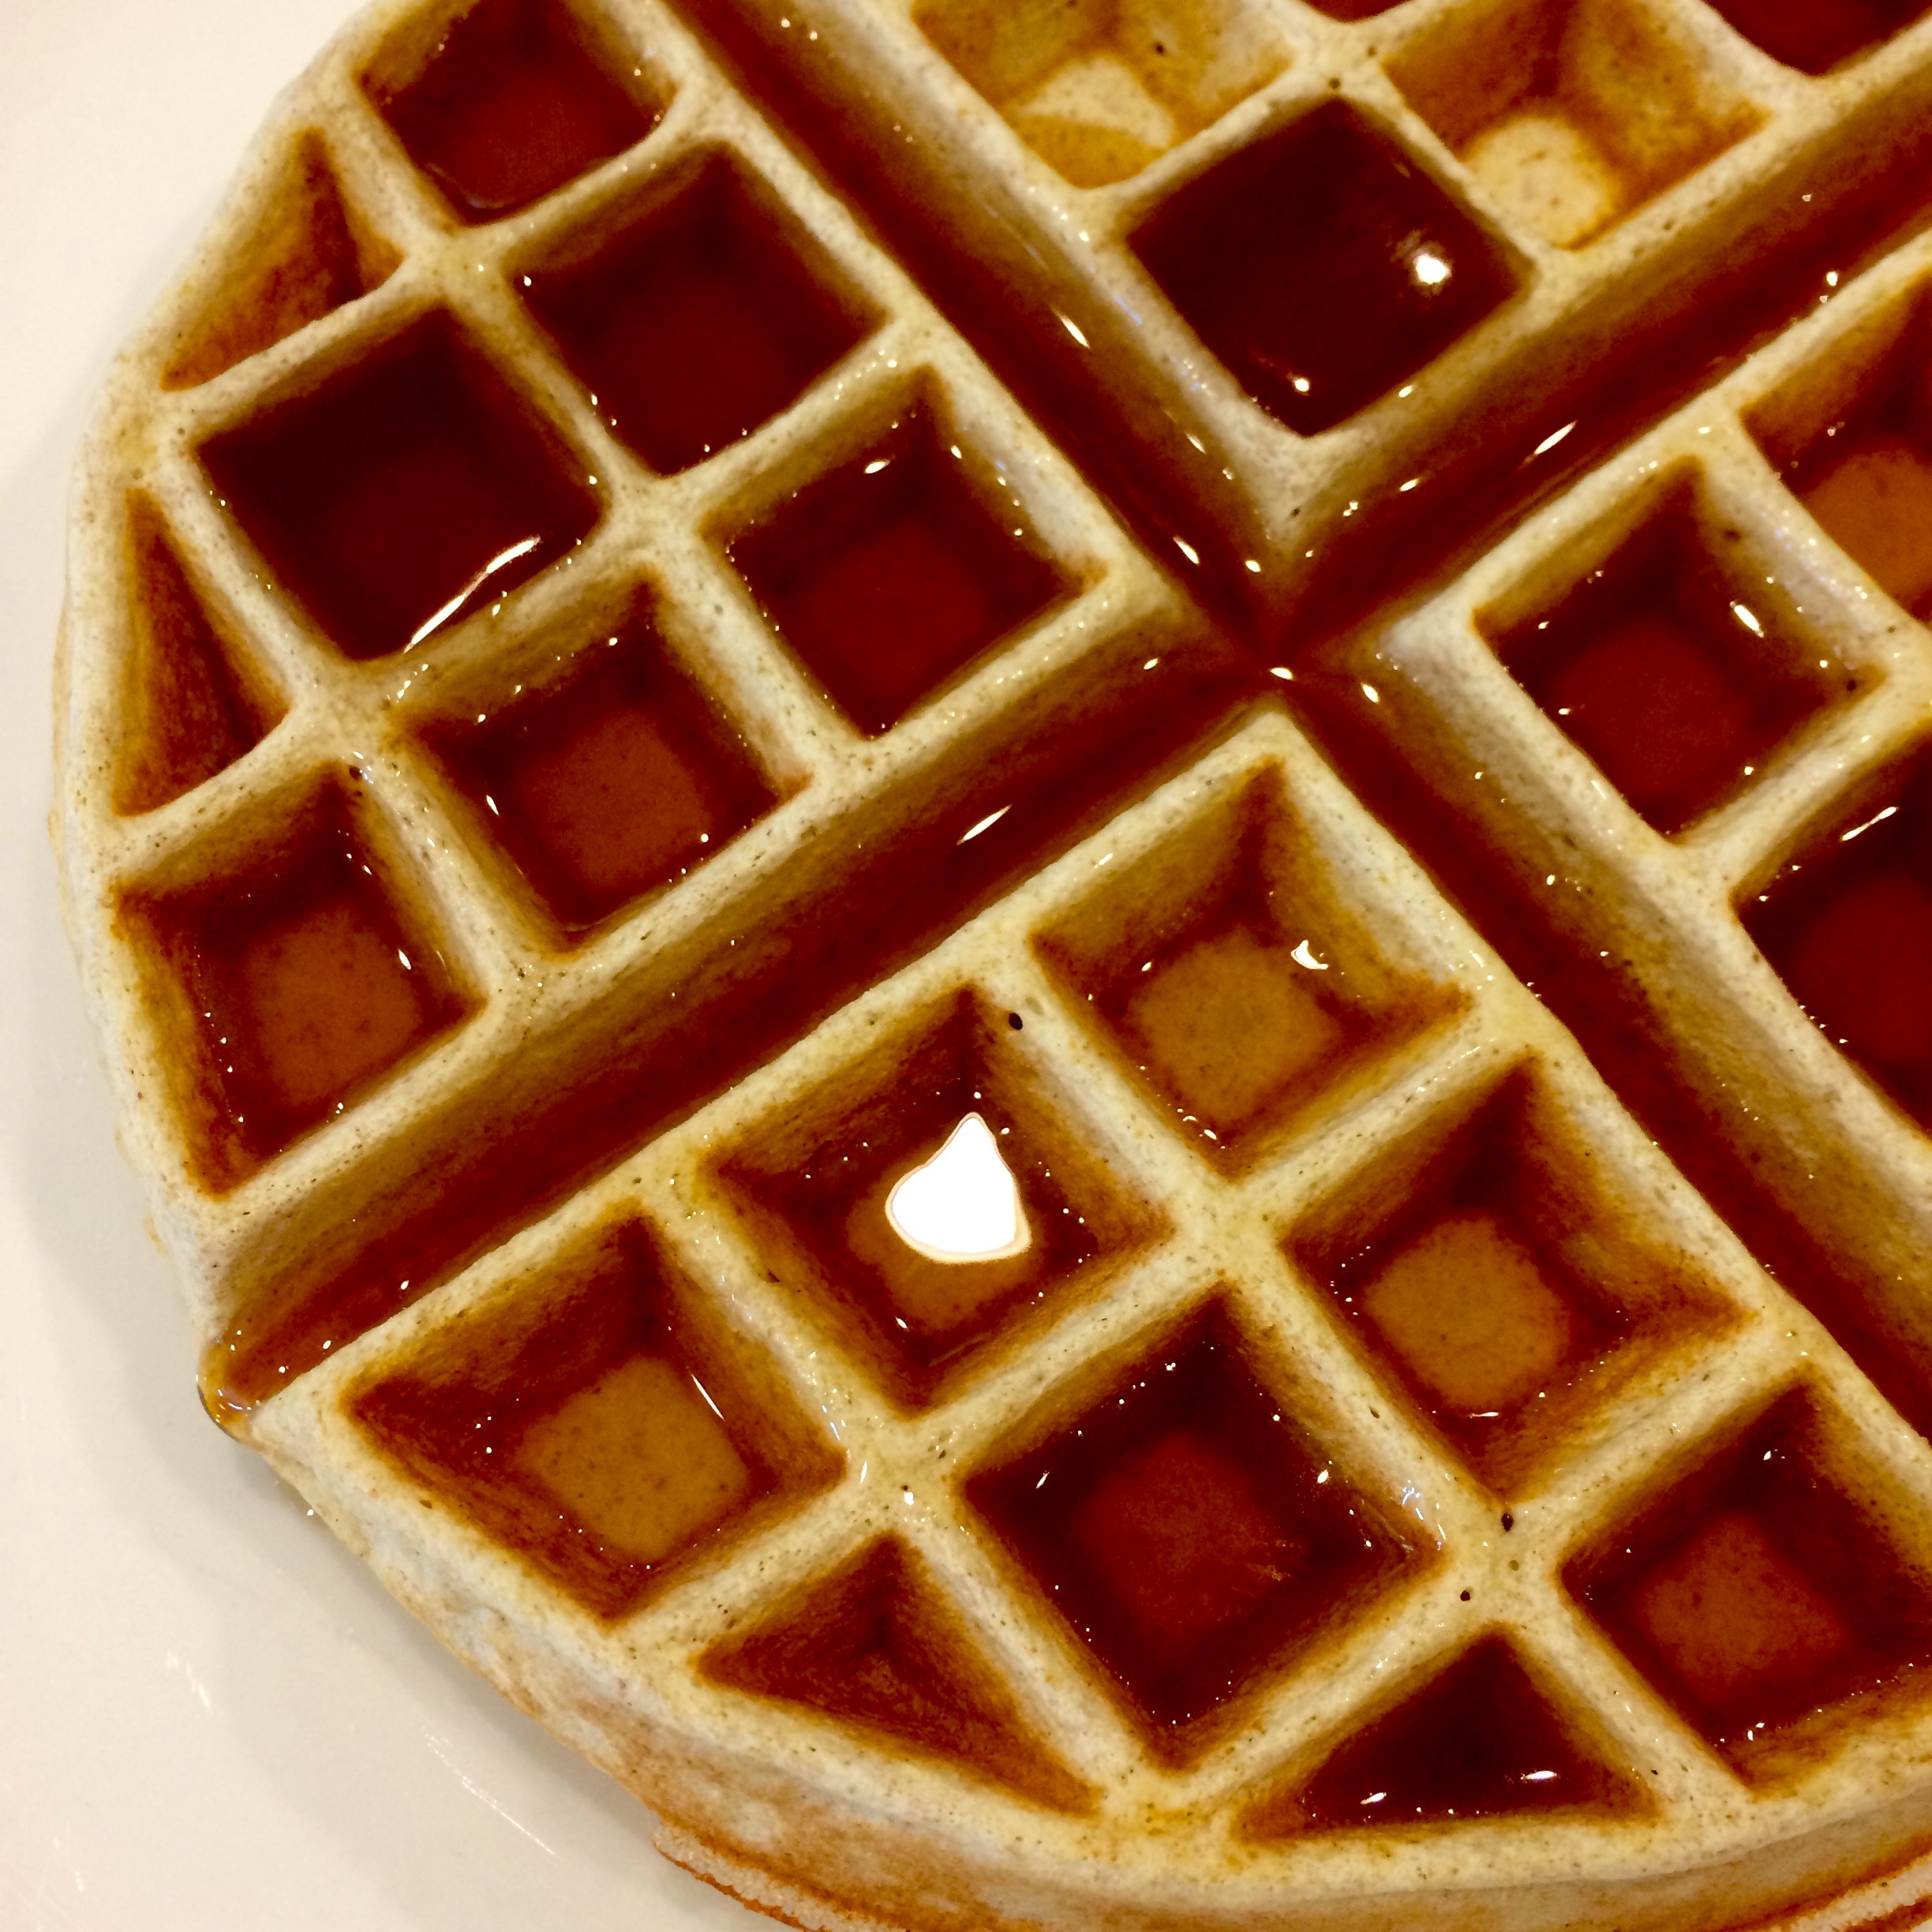
Balanced Grettie Lower Carb Gluten Free Waffle with Syrup BITE

This is my go-to waffle recipe.  It has taken me a while to perfect, but I know it’s good when the rest of my family actually likes them and tries to steal bites when I make one for myself.  Let’s face it, I like a lot of foods that the general public probably wouldn’t be into…this is a recipe the general public will be into.

I like this recipe as either a HUGE Belgian waffle or pancakes.  The only difference between making these into waffles or pancakes will be the batter consistency (aka how much water you add).  Waffle batter tends to be thicker and pancake batter thinner (it is basically personal preference).

I like to eat the whole recipe myself, but you can easily split it in half or eat as much as your macros allow.  I also like to top my waffle with strawberries, but again that is personal preference.

If you don’t want to use syrup you can add a little stevia to the batter.

Balanced Grettie Lower Carb Waffle Ingredients

INGREDIENTS

40 grams Krusteaz gluten -free buttermilk pancake mix

1 Tbs coconut flour (pack it into the Tbs vs. the scoop and scrape method)

2 Tbs Fufu (Plantain Flour)

6 Tbs organic egg whites

Water (amount varies)

METHOD

Preheat your waffle maker or a pan on medium heat if making pancakes.

Place the pancake mix, coconut flour, and fufu flour into a mixing bowl.  Add the egg whites and a little water to start (2-3Tbs).  Mix.

The coconut flour will absorb a lot of water, so add water a little at a time until it reaches the right consistency.  It seems like the amount of water I use is different every time, so play around with it.  You can also add some more egg whites if you have more protein macros to use-up.  I have used as little as 4Tbs and as much as 8Tbs with great results.

Spray coconut oil onto the waffle maker or pan.

Cook as you would any regular waffle or pancake.

Here is the macro breakdown for the recipe as written:

Balanced Grettie Lower Carb Waffle Macros IIFYM


Balanced Grettie Lower Carb Gluten Free Waffle with Syrup

1 Comment

Filed under Breads / Crackers / Muffins, Breakfast, Cake, Dessert, Family Recipe Make-Over, Gluten Free, Kid Friendly, Quick, Recipe Redux, Recipes

Roasted Japanese Eggplant

Roasted Japanese Eggplant Balanced Grettie Collage

Eggplant used to intimidate me.  I was always told that if you didn’t prepare it right the eggplant would turn out bitter, so I think I avoided making it myself and just stuck to ordering it when I went out to eat.

This year I decided to plant Japanese eggplant in my garden, so I guess that meant I would have to learn how to work with it.  I have one Japanese eggplant plant in my garden and it has just gone nuts.  I pick at least 10 eggplant on a weekly basis!

When I had my first eggplant harvest I did a quick search for recipes and found THIS one on the Real Healthy Recipes blog.

I simplified the recipe by leaving out the lemon since I like to prepare a ton at a time and want to be able to use it throughout the week for different purposes (not every meal lends itself to lemon).  I also use about 1/2 that amount of oil and found that I only need to roast them for about 18-22 minutes (maybe my eggplant are small?).  The first time I made this recipe I roasted the eggplant for the full 40 minutes and found them too be a little too mushy for my taste.

Scoring the eggplant as she suggests really allows the garlic flavor to get in there and they turn out so pretty.

Head on over to the Real Healthy Recipes blog to find out the method for preparing this yummy eggplant dish.  Click HERE for the printable recipe.

2 Comments

Filed under Appetizers, Gluten Free, Quick, Recipes, Sides, Vegan, Vegetables

How I Prep Chicken & Grilled Veggies

I am a big-time food prepper.  In order to maintain a healthy lifestyle it has to be easy and for me that means keeping healthy food in the fridge ready to go.  It’s easy to grab some carbs to round out a meal, so having some protein and veggies ready is key.

For years now I have been prepping mass quantities of chicken breasts every few weeks.  I’d rather do a WHOLE BUNCH every once in a while than every few days.  BBQ in bulk I say.

This is the method that works for me and I thought it might be of interest to you.  My Greek marinade recipe is so simple and not a perfect science in that it is a little bit different every time…I don’t do any precise measurements when I make it.  Growing-up my parents made a Greek Lemon Oregano Chicken and that is what this is based on.

With regards to counting macros, I know some people would count the lemon and the olive oil, but I take a somewhat laid-back approach to that and don’t include that in my daily macros because let’s be honest, most of the olive oil cooks off on the BBQ and just makes it so it doesn’t stick to the grill.  Now, if my chicken had a sauce poured over it after it had been prepared and was served to me that way, I would most definitely count that in my daily macros.

For the “cup” measurements I just use those that are written on the side of my Vitamix.  Today I doubled the recipe since I was making 15 chicken breasts as well as 2 bunches of grilled asparagus.

Balanced Grettie Greek Lemon Oregano Marinade Collage

Greek Lemon Oregano Marinade

  • 1 cup lemon juice
  • 1 cup organic olive oil (I buy mine at Costco)
  • 1 head of garlic, break apart the cloves and peel them
  • 1 Tbs kosher salt
  • 1 Tbs whole pepper corns
  • 1/4 cup dried oregano

Method

Place all ingredients EXCEPT for the dried oregano into the Vitamix and blend until smooth.  Add the dried oregano and blend briefly so you preserve the leaves and don’t pulverize them (just personal preference).

CHICKEN & VEGGIE PREP

When it comes to prepping the chicken, the best trick I have discovered is to pound it.  By pounding the chicken and making it all the same thickness, you end-up with evenly cooked chicken and chicken that BBQs a heck of a lot faster!  It is super moist vs. having uneven dry spots like so often happens with THICK chicken breasts  (as long as you don;t overcook it!).

I allow the chicken to marinade for 4-8 hours…with this amount of lemon overnight would be TOO much (learned that the hard way)!  Make sure you reserve some of the marinade for your veggies.  This works awesome with asparagus, zucchini, bell peppers, mushrooms, etc.

I like to place a flat black trash bag on my counter in order to avoid chicken juice flying everywhere (and it makes the clean-up a snap).  I also pound the chicken inside a produce bag from the grocery store for the same reason.  As for how the rest of the prep goes…I’ll tell it in pictures.

Balanced Grettie Chicken Prep pounded

Balanced Grettie Lemon oregano Greek Chicken prep pounding method Balanced Grettie Marinating Asparagus in a bag

Chicken Asparagus Prep 2

Once my chicken is BBQ’d and has cooled, I put about 4 breasts in the fridge and I vacuum pack bags of 4 and put them in the freezer.  When I am running out of prepped chicken in the fridge I pull out a bag from the freezer and defrost it in cold water (MUCH better result than defrosting in the microwave…I’m not a huge microwave fan).

Do any of you have food prep tricks you’d like to share?


6 Comments

Filed under Gluten Free, IIFYM and Macros, Main Dish, Nutrition, Paleo, Quick, Quick Tips, Recipes, Sauce / Spread / Jam / Yogurt

High Protein Taco Trick

High Protein Taco Trick

I thought I’d share a quick trick with you that will help you get more protein in your diet.

The one glaring consistency I see among my clients is that prior to working with me they drastically under-eat protein.  Most of my clients struggle at first to find ways to add protein to their diets and this is one solution I use frequently in my own meals.

Egg whites are an amazing source of protein and they make an appearance on my table daily in one form or another.

To make the high protein taco base, I spray some olive oil (a tiny bit) into a pan, add in my measured egg whites (I used 1/3c per taco today), season with salt, top with a corn tortilla (I like the Don Pancho corn tortillas…only 10g carbs per tortilla), top with a cover and cook until no longer liquid, then flip and cook for another 30 seconds or so.

I love this method because it keeps the egg and tortilla together vs. trying to add scrambled egg whites to a taco which just ends-up getting messy and falling apart.

Today I had three tacos for lunch.  The egg whites and corn tortilla usually form the base of my taco because it is filling and nutritious…the toppings change and vary between:

  • grilled chicken
  • pulled pork (my husband makes the most amazing pulled pork!)
  • shrimp*
  • white fish
  • salmon
  • steak

*I have been buying shrimp pre-cooked from Costco and pre-portioning it into 3oz. bags to keep in the freezer for quick meals

You can pretty much guarantee that I will usually add:

  • Good Foods guacamole (the singles from Costco are a favorite)
  • Tapatillo
  • shredded cabbage (for further bulk)

What are your favorite tricks for getting your daily protein in???

2 Comments

Filed under Gluten Free, Kid Friendly, Main Dish, Protein, Quick, Quick Tips, Recipes

EGG-FREE PALEO MACAROONS

Elana's Pantry Egg-Free Paleo Macaroonsphoto provided courtesy of elanaspantry.com

.

Summer is here for my kids…yay!!!  School just got out and I couldn’t be happier.  I just made these Egg-Free Paleo Macaroons and they are in the oven as I type.  The macaroons came together insanely fast and I already had all of the ingredients in my pantry.  If the batter is any indication, these are going to be amazing.

.

Egg-Free Paleo Macaroons

Recipe provided courtesy of Elana’s Pantry

  1. In a food processor, combine shredded coconut and coconut flour
  2. Pulse in salt, coconut oil, honey, and vanilla
  3. Dough will form a ball
  4. Scoop batter 1 level tablespoon at a time onto a parchment paper lined baking sheet
  5. Bake at 350° for 7 minutes
  6. Cool and serve

Makes 12 macaroons

.

For a printable version of this recipe click HERE.

5 Comments

Filed under Cookies / Bars, Dessert, Gluten Free, Kid Friendly, Quick, Recipes, Vegan, Vegetarian

CHINESE-STYLE GRAPEFRUIT

grapefruit (4)

I have learned so much marrying into a Chinese family.  One of the first observations my husband and I made relating to our cultural differences was that (in general) Chinese people do not eat raw vegetables (salad is not a very Chinese dish) and they don’t cook their fruit (he tried apple pie for the first time with me).

Chinese people are also very big on peeling fruit.  Whereas I LOVE apple peels, etc. my husband had to acquire the taste since his father always peeled his apples (and the rest of the fruit he ate).

My father-in-law will painstakingly remove the membranes from my children’s tangerines.  Tangerine membranes are quite thin which makes this a very time-consuming job.

Fortunately it is SO EASY to remove the membranes from grapefruit and pomelos.  I had never eaten a pomelo before meeting my husband.  I always liked grapefruit, but I hated the time it took to prepare them buy cutting around the membranes, etc.  All of this changed when my hubby showed me the Chinese way.  The membranes on grapefruits and pomelos are very thick and loose which makes removing them a cinch.

grapefruit chinese style collage

The white grapefruits at my local farmer’s market are so sweet and juicy right now which means that I have been eating a lot of them…always the Chinese way.  I remove the peel from the grapefruit and keep them in the fridge (whole) so they are ready for a quick snack.  Remove the membranes as you eat them (this will keep them fresh).

Have any of you tried eating grapefruit or pomelos this way?

grapefruit segment collage

5 Comments

Filed under Quick, Raw, Recipes, Vegan, Vegetarian

SKINNY BITCH CHILI

I originally blogged about this Skinny Bitch chili recipe HERE and thought I would re-post the recipe since it is an awesome FAST and EASY one to make for the Super Bowl.

This chili tastes great over polenta, brown rice, with a side of cornbread or on its own.

DEB’S CHILI – Yields 6 servings

2 Tbs grapeseed oil (I omitted this)
1 medium onion, finely diced
1 (4-ounce) can green chilis, diced
1 envelope taco seasoning
1 (28-ounce) can tomatoes, diced
1 (15-ounce) can kidney beans, drained and rinsed
1 (15-ounce) can black beans, drained and rinsed
1/2 cup salsa
2/3 cup vegan cheddar cheese, shredded (I omitted this)
1/4 cup vegan sour cream (I omitted this)

In a large saucepan, heat the oil over medium heat and sauté the onions until soft, about 5 minutes (I water sautéed mine). Stir in the chilis, taco seasoning, tomatoes, kidney beans, and black beans. Let the mixture simmer for about 15 to 20 minutes (after water sautéing the onions I threw all of the ingredients in the slow cooker around lunchtime and kept it on low until dinner).

Serve with salsa, cheese, and sour cream.

Leave a comment

Filed under Beans/Legumes, Gluten Free, Holiday, Main Dish, Quick, Recipes, Soup, Vegan, Vegetarian